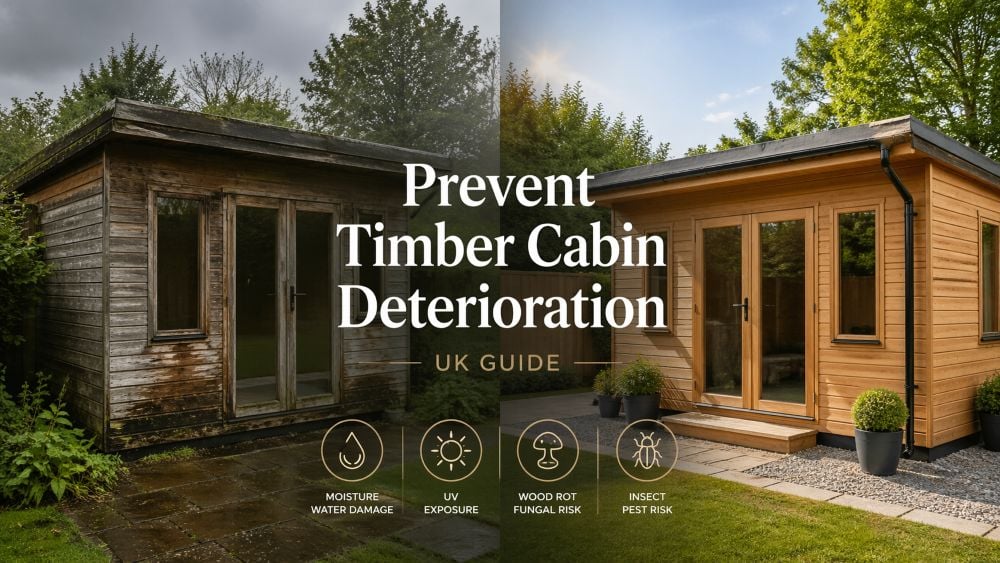
How to Fix Damp and Draughts in a Garden Log Cabin
A step-by-step checklist to keep your cabin warm, dry and mould-free all year round
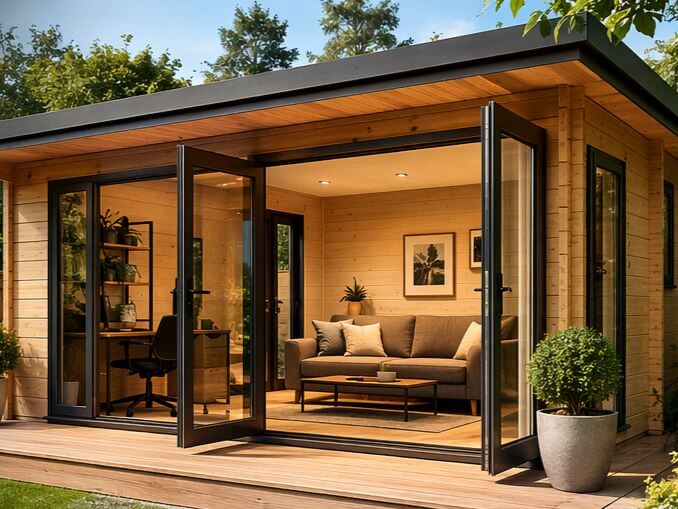
A garden log cabin should feel like useful extra space.
Warm.
Dry.
Comfortable.
A place where you can work, relax, exercise or escape the noise of the house.
But when damp patches, condensation, mould or draughts start appearing, the whole thing changes.
Suddenly your garden office feels cold.
The windows are wet in the morning.
The corners smell musty.
The floor feels chilly.
The doors do not seal properly.
And instead of using the cabin, you start avoiding it.
The good news is that most garden log cabin dampness and draughts can be fixed.
But you need to diagnose the problem properly first.
Because condensation, leaks and draughts are not the same thing.
And if you fix the wrong problem, you waste money.
First, work out what type of damp you have
Before you buy sealant, insulation, vents or a dehumidifier, stop and inspect the cabin properly.
There are usually three common causes of damp in a garden log cabin:
- Condensation
- Water leaks
- Moisture coming from poor airflow, poor insulation or poor sealing
They can look similar at first.
But the fix is different.
Condensation is normally caused by warm moist air hitting cold surfaces. Leaks are caused by water getting in from outside. Draughts are caused by gaps that allow cold air to enter the building.
A cabin can also have more than one issue at the same time.
That is why the first job is not fixing.
The first job is finding the cause.
Step 1: Check whether it is condensation or a leak
This is the most important step.
A lot of people see water on the windows or damp near the walls and immediately assume the cabin is leaking.
Sometimes it is.
But often, especially in winter, it is condensation.
Condensation happens when moisture in the air settles on cold surfaces such as glass, corners, roofs, floors or uninsulated walls. Government guidance explains that damp and mould should be taken seriously because excess moisture and mould can affect health as well as the building itself.
Here is a simple checklist.
Signs it is probably condensation
- Water appears on the inside of windows
- The problem is worse in cold weather
- Mould appears in corners or behind furniture
- The cabin feels stuffy or humid
- Moisture appears after long periods of use
- The cabin dries out when heated and ventilated
- There is no clear external point where water is entering
Signs it may be a leak
- Damp appears after heavy rain
- Water marks are in one specific area
- Damp runs down from the roof or around a window
- The same patch gets wet repeatedly
- Timber near joints, corners or roof edges stays wet
- There are stains around the door, window frame, roof edge or wall joint
Simple test
Dry the area fully.
Then check it again after:
- a dry cold day
- a wet windy day
- a day when the cabin has been used and heated
If it gets wet after rain, suspect a leak.
If it gets wet after use, heating or cold nights, suspect condensation.
This one test can save you a fortune.
Step 2: Look for obvious leak points
If you think water is getting in from outside, inspect the cabin from top to bottom.
Start at the roof.
Water usually enters from above, then travels before it becomes visible.
Check:
- roof covering
- roof edges
- felt, shingles, EPDM or roof joints
- fascia boards
- guttering
- downpipes
- roof overhangs
- corners
- window frames
- door frames
- wall joints
- gaps between logs
- base of the cabin
- splashback from rain hitting the ground
Look for cracks, lifted roof material, failed sealant, blocked gutters, standing water, or areas where rain is being driven against the timber.
Do not ignore the base.
If water is sitting around the cabin base, soaking into timber or splashing back against the walls, you will struggle to keep the building dry.
Water needs to be taken away from the cabin, not held against it.
Step 3: Improve ventilation before sealing everything
This sounds strange, but it matters.
Many people try to fix damp by sealing every gap.
That can help with draughts.
But if you seal a cabin too tightly without proper ventilation, moisture gets trapped inside.
That can make condensation worse.
Energy Saving Trust advice on damp highlights four key areas: reduce moisture build-up, improve ventilation, maintain a suitable temperature and use other moisture-control methods where needed.
So the principle is simple:
Seal unwanted draughts, but keep controlled ventilation.
There is a difference.
A draught is uncontrolled cold air coming through gaps.
Ventilation is controlled airflow that lets moist air escape.
You want to stop the first without killing the second.
Useful ventilation options include:
- wall vents
- trickle vents
- opening windows daily
- extractor fan if the cabin has a toilet, shower, sink or heavy moisture use
- leaving a small air gap behind furniture
- keeping vents clear
- using a dehumidifier in winter if needed
NHBC guidance also says good ventilation is essential for maintaining moisture balance and sometimes needs to be increased temporarily to avoid dampness and mould growth.
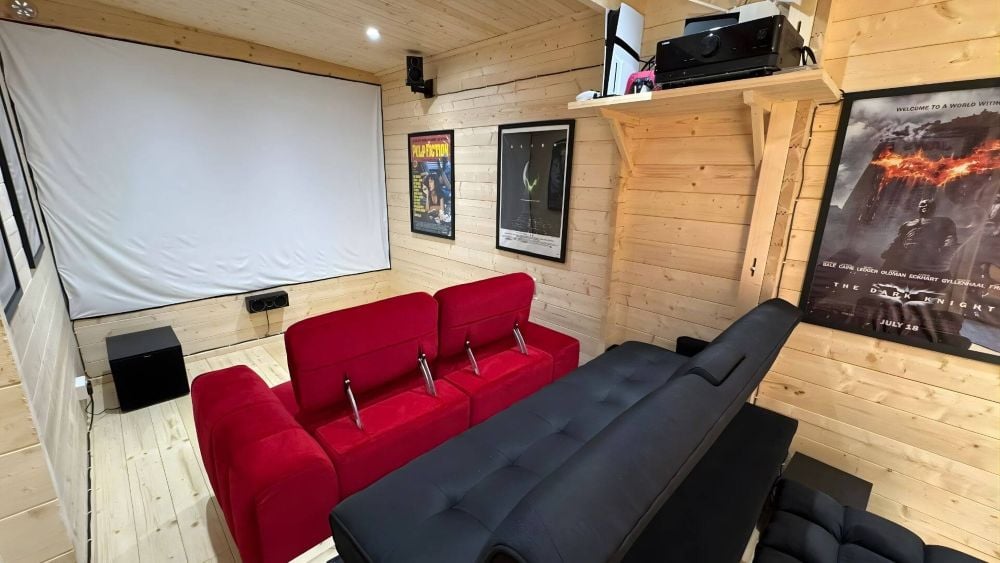
For a garden log cabin used as an office, gym or extra living space, this matters even more because you are breathing, heating the space, using screens, maybe drinking tea or coffee, and possibly drying coats or dog towels inside.
That moisture has to go somewhere.
Step 4: Control moisture inside the cabin
A garden log cabin does not create moisture by itself.
Moisture usually comes from how the space is used.
Common sources include:
- breathing
- wet coats
- damp shoes
- drying clothes or towels
- kettles
- portable gas heaters
- poorly ventilated heaters
- dogs coming in wet
- plants
- lack of airflow
- sudden bursts of heat after long cold periods
For a garden office, the main issue is often temperature swings.
The cabin is cold overnight.
You turn on the heater in the morning.
Warm air hits cold windows and walls.
Condensation forms.
To reduce moisture:
- do not dry washing in the cabin
- avoid portable gas heaters
- wipe down wet windows in the morning
- open a window briefly each day
- keep furniture slightly away from walls
- use a small dehumidifier if moisture keeps returning
- heat the cabin steadily rather than blasting heat for short periods
- keep wet coats, boots and towels out if possible
Energy Saving Trust also notes that rooms where heating is turned off or kept very low in colder months can be prone to damp problems, and that ventilation or occasional heating may be needed.
This is where balance matters.
You need heat.
You need ventilation.
You need moisture control.
Miss one, and damp can return.
Step 5: Check the insulation
A cold cabin is more likely to suffer from condensation.
Why?
Because cold surfaces attract moisture.
Warm air can hold more moisture than cold air. When warm moist air touches a cold surface, the moisture can settle as condensation.
That is why insulation and ventilation need to work together.
Good insulation helps keep internal surfaces warmer. Ventilation helps moist air escape.
For year-round use, think about:
- floor insulation
- roof insulation
- wall thickness
- window quality
- door quality
- draught sealing
- heating
- ventilation
The roof and floor are especially important.
A lot of heat escapes upwards.
A lot of cold comes through the floor.
If your cabin has uninsulated floors and roof, it may always feel harder to heat and more prone to temperature swings.
But be careful with insulation.
Poorly fitted insulation can create hidden condensation problems inside the building fabric. NHBC explains that interstitial condensation can happen when warm moist air moves into colder parts of walls or roofs and reaches a temperature where condensation forms within the structure.
Plain English?
Do not just stuff insulation anywhere and hope for the best.
Think about airflow, vapour control, sealing and ventilation.
If you are upgrading an existing cabin, get advice before adding insulation internally, especially in walls or roof spaces.
Step 6: Draught-proof windows and doors
Draughts make a garden log cabin feel cold even when the heater is on.
The usual culprits are:
- window frames
- door frames
- poorly adjusted doors
- gaps around hinges
- worn seals
- gaps under doors
- settlement gaps in timber
- joints between walls and floor
- service holes for cables or pipes
Energy Saving Trust defines draught proofing as blocking unwanted gaps that let in too much cold air, while warning that over-sealing can increase the risk of poor air quality if ventilation is not maintained.
So again, the rule is:
Block gaps. Do not block proper vents.
For draft proofing windows and doors, check:
- rubber seals
- brush strips
- compression seals
- hinges and locks
- threshold strips
- frame sealant
- expanding foam around hidden gaps
- silicone or frame sealant where appropriate
A door that has dropped slightly can often create a draught along the top or bottom.
A window that does not close evenly can do the same.
Sometimes the fix is not more sealant.
Sometimes the fix is adjustment.
Step 7: Seal gaps properly
Weatherproofing and sealing gaps is one of the simplest ways to improve comfort.
But use the right product in the right place.
Common areas to check:
- around window frames
- around door frames
- where walls meet the floor
- corners
- external joints
- knots or splits
- service entry points
- roof-wall junctions
- under thresholds
- between log boards if settlement has opened gaps
Possible materials include:
- external-grade silicone
- flexible frame sealant
- expanding foam for larger hidden voids
- timber filler for small cosmetic gaps
- draught-proofing tape
- brush strips
- rubber seals
- threshold bars
Do not use rigid filler where the timber needs to move.
Log cabins expand and contract with moisture and temperature changes. That is normal.
Use flexible products where movement is likely.
And always check the manufacturer’s guidance if your cabin is still under warranty.
Step 8: Check the outside treatment
Timber needs protection.
If the outside of the cabin has not been treated properly, moisture can soak into the wood, especially during wet UK weather.
Check:
- when the cabin was last treated
- whether the treatment is suitable for external timber
- whether exposed edges are protected
- whether corners and joints are covered
- whether water beads or soaks into the timber
- whether the colour has faded badly
- whether there are cracks or bare patches
A garden log cabin should not be left untreated.
External timber treatment helps protect against rain, UV damage and moisture movement.
Pay close attention to:
- south-facing walls exposed to sun
- walls hit by prevailing rain
- door and window surrounds
- bottom logs
- corners
- end grain
- roof edges
If water is soaking in instead of running off, it is time to retreat the cabin.
Step 9: Keep the roof and gutters working
A lot of damp problems start with poor rainwater control.
Check the roof and guttering after heavy rain.
Look for:
- overflowing gutters
- blocked downpipes
- water running down walls
- standing water near the base
- roof covering damage
- lifted edges
- ponding on flat roofs
- moss build-up
- rotten fascia boards
- leaks around fixings
Water should move away from the cabin quickly.
If gutters overflow, water may soak the walls.
If the ground slopes towards the cabin, water may gather at the base.
If the roof covering is damaged, damp may show up inside days or weeks later.
This is basic maintenance, but it matters.
A dry cabin starts outside.
Step 10: Improve heating habits
Heating does not fix every damp problem.
But poor heating habits can make condensation worse.
The worst pattern is usually this:
Cabin is left freezing all night.
Heater is turned up high for an hour.
Warm moist air hits cold glass and timber.
Condensation appears.
A steadier approach often works better.
For a garden office, consider:
- a thermostatic electric heater
- timer control
- low background heat in cold weather
- avoiding unflued gas heaters
- warming the space before long use
- ventilating briefly after use
- using a dehumidifier if needed
The goal is not to roast the cabin.
The goal is to avoid extreme cold-to-hot swings while letting moisture escape.
Warm and stuffy is not the answer.
Warm, ventilated and dry is the answer.
Step 11: Remove mould safely
If mould has already appeared, deal with it quickly.
Do not just paint over it.
That hides the problem but does not solve it.
General steps:
- Wear gloves and take care when cleaning.
- Wipe away surface condensation.
- Clean mould with a suitable mould remover.
- Let the area dry fully.
- Fix the cause of moisture.
- Improve ventilation and heat balance.
- Monitor the area over the next few weeks.
If mould is widespread, keeps returning, or is linked to leaks or structural damp, get professional help.
Government guidance is clear that damp and mould can pose health risks and should be dealt with promptly.
The big point:
Mould is a symptom.
The real issue is the moisture source.
Remove the mould, yes.
But then fix why it appeared.
Quick checklist: fixing garden log cabin dampness and draughts
Use this as your practical inspection list.
Diagnosis
- Is the damp worse after rain?
- Is the damp worse after heating or using the cabin?
- Is water on the inside of the glass?
- Are there wet patches in one location?
- Is there a musty smell?
- Is mould appearing behind furniture?
- Are walls, floor or roof cold to touch?
Condensation fixes
- Improve ventilation
- Open windows briefly each day
- Keep vents clear
- Use a dehumidifier if needed
- Avoid drying wet items inside
- Use steady heating
- Keep furniture away from walls
- Wipe windows when wet
Leak fixes
- Check roof covering
- Clear gutters and downpipes
- Inspect window and door frames
- Seal external gaps
- Check roof edges and corners
- Improve water run-off
- Treat external timber
- Fix damaged or lifted roof materials
Draught fixes
- Adjust doors and windows
- Replace worn seals
- Add brush strips
- Seal around frames
- Check floor-wall junctions
- Seal service holes
- Fit threshold strips
- Do not block ventilation
Long-term prevention
- Insulate properly
- Ventilate properly
- Heat steadily
- Maintain external treatment
- Keep gutters clear
- Check seals each year
- Keep the base dry
- Deal with mould quickly
Common mistakes to avoid
Mistake 1: Sealing everything and blocking airflow
This can trap moisture and make condensation worse.
Mistake 2: Assuming all damp is a leak
Many winter damp problems are caused by condensation, not water coming through the roof.
Mistake 3: Adding insulation without thinking about ventilation
Insulation helps, but badly designed insulation can create hidden moisture issues.
Mistake 4: Ignoring the base
If water sits around the bottom of the cabin, damp will keep coming back.
Mistake 5: Using the wrong heater
Portable gas heaters can add moisture to the air. For a garden cabin, electric heating is usually the cleaner option.
Mistake 6: Leaving mould until spring
Mould should be dealt with quickly. Waiting makes it harder to fix.
Can an old damp garden log cabin be saved?
Often, yes.
If the timber is sound and the issue is mainly condensation, draughts, poor ventilation or tired seals, the cabin can usually be improved.
You may need:
- better ventilation
- new seals
- draught-proofing
- roof maintenance
- external timber treatment
- insulation upgrades
- improved heating
- better moisture control
But if the cabin has rotten timber, long-term leaks, structural movement or a failed base, the repair may be more serious.
That is when it is worth getting someone experienced to inspect it.
How to prevent damp before buying a garden log cabin
The best time to solve damp and draught problems is before the building is installed.
When choosing a garden log cabin for year-round use, ask:
- Is the roof insulated?
- Is the floor insulated?
- What roof covering is included?
- How is the base built?
- Is ventilation included?
- What windows and doors are supplied?
- Are the doors properly sealed?
- What external treatment is needed?
- Is the building suitable for office use?
- What maintenance will be required?
A cheap, thin, poorly insulated cabin may be fine for summer storage.
But it is not the same as a warm, dry garden office.
Be honest about how you will use it.
If you want a year-round garden room, buy a year-round specification.
Final answer: how do you fix damp and draughts in a garden log cabin?
Start with diagnosis.
Find out whether the problem is condensation, a leak, poor ventilation, poor insulation, draughts, or a mix of several issues.
Then fix it in the right order:
- Stop water getting in.
- Improve ventilation.
- Control moisture.
- Add or improve insulation.
- Draught-proof windows and doors.
- Seal external gaps.
- Maintain the roof, gutters and timber.
- Use steady heating.
- Monitor the cabin through wet and cold weather.
That is how you keep a garden log cabin warm, dry and mould-free.
Not just for summer.
All year round.
Need help choosing a dry, warm garden log cabin?
At Logspan, we help UK homeowners choose garden log cabins, garden offices and timber buildings that suit the way they actually want to use the space.
If you want a garden cabin for work, hobbies, family life or year-round use, the right specification matters.
Visit our Glasgow show site or speak to the Logspan team for practical advice on insulation, ventilation, weatherproofing and choosing the right building for your garden.
Contact Logspan today to discuss your garden log cabin project.